

Tank maintenance
Safety procedures


Fuel tank maintenance requires strict safety and security measures to avoid accidents and protect lives and property. Basic safety and security guidelines during fuel tank maintenance:
1- Training and Qualification: - Employee Training: All fuel tank maintenance personnel must be adequately trained in safety procedures and handling hazardous materials.
2- Personal Protective Equipment (PPE): - Protective Clothing: Wear fire- and chemical-resistant clothing. - Protective Gloves and Goggles: Use chemical-resistant gloves and goggles to protect your eyes. - Safety Footwear: Wear shoes with slip-resistant, static-resistant soles.
3- Emptying and Ventilation: - Emptying the Tank: Before starting maintenance, the tank must be completely emptied of fuel and hazardous gases. - Good Ventilation: Ensure adequate ventilation to prevent the accumulation of flammable vapors.
4- Handling Chemicals: - Safe Storage: Store chemicals used for maintenance in designated, secure locations. - Safe Disposal: Dispose of chemical waste in accordance with local and international laws.
5- Preventing fires and explosions: - Preventing ignition sources: Avoid using any ignition sources such as cigarettes or unsafe electrical appliances. - Fire extinguishers: Provide appropriate fire extinguishers in the workplace and know how to use them.
Steps to start working
The first step is to clean if there is a tank inspection room:

-
Ensure that all gasoline and diesel fuel are removed from the tank.
-
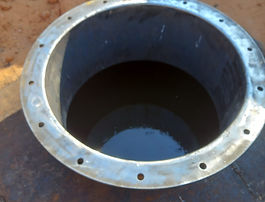
Open the covers (inspection hatches) to access the tank opening, unscrew the screws, and lift the cover.
-
Leave the lid open to ventilate for at least two hours, then extract the gases.
-
The gas detector is turned on to ensure the result percentage, which must be 0%, before starting any work.

-
Fill the tank with fresh water, add cleaning materials, and leave it for at least 3 hours.
-
All water and sediment at the bottom of the tank are then removed.
-
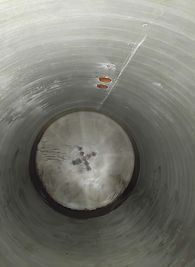
The technician enters the tank, cleans the remaining sediment, and thoroughly cleans it.
-
The tank is then photographed from all angles to ensure it is free of any corrosion or holes.


The second step is cleaning if there is no tank opening:
-
All precautionary measures are taken with extreme caution when cutting off the tank.
-
The tank is cut if it is not present at the time of drilling in order to make a new hole, then the technician enters to begin cleaning.
-
This procedure, as we mentioned, allows the technician to enter the tank to be cleaned and submit a report on the tank's condition, including the absence of any corrosion or holes, along with dimensions. If corrosion or holes are found, they are repaired, and the lining requirements are addressed, which will be discussed later.


Tanks after cleaning work is completed


The third step is sanding and lining in case there is any corrosion or holes in the tank and start treating all the corrosion and holes.

The technician will begin preparing all safety measures and begin the full maintenance, which is lining.
-
Fuel Tank Lining is the process of applying a protective coating to the interior walls of tanks to provide protection against corrosion, leakage, and deterioration caused by chemical reactions with fuel or environmental factors. This technology is commonly used in fuel tanks to ensure longer life and better performance.


Tanks after lining


